I am no longer actively blogging here at "Taking Time To Create", but I'd love for you to join me at my new blog: "Taking Time In The City". I hope to see you soon!

Showing posts with label ladies. Show all posts

Tuesday, June 26, 2012

Four Flowers {Ladies' Card}

This is one of those cards that could easily be used for any occasion. You just have to switch out your sentiment. Mine is a birthday card!
 
This card is super simple with just enough detail. Here's how to make one of your own:

  1. Cut your standard white card stock base of 5.5 inches by 8.5 inches. Score and fold it in half to create a card 4.25x5.5 inches.
  2. Cut a piece of light green card stock 4x5.25 inches for your background piece. Don't glue it to the white base yet.
  3. Cut 4 pieces of white card stock 1x3.75 inches for your flower pieces. 
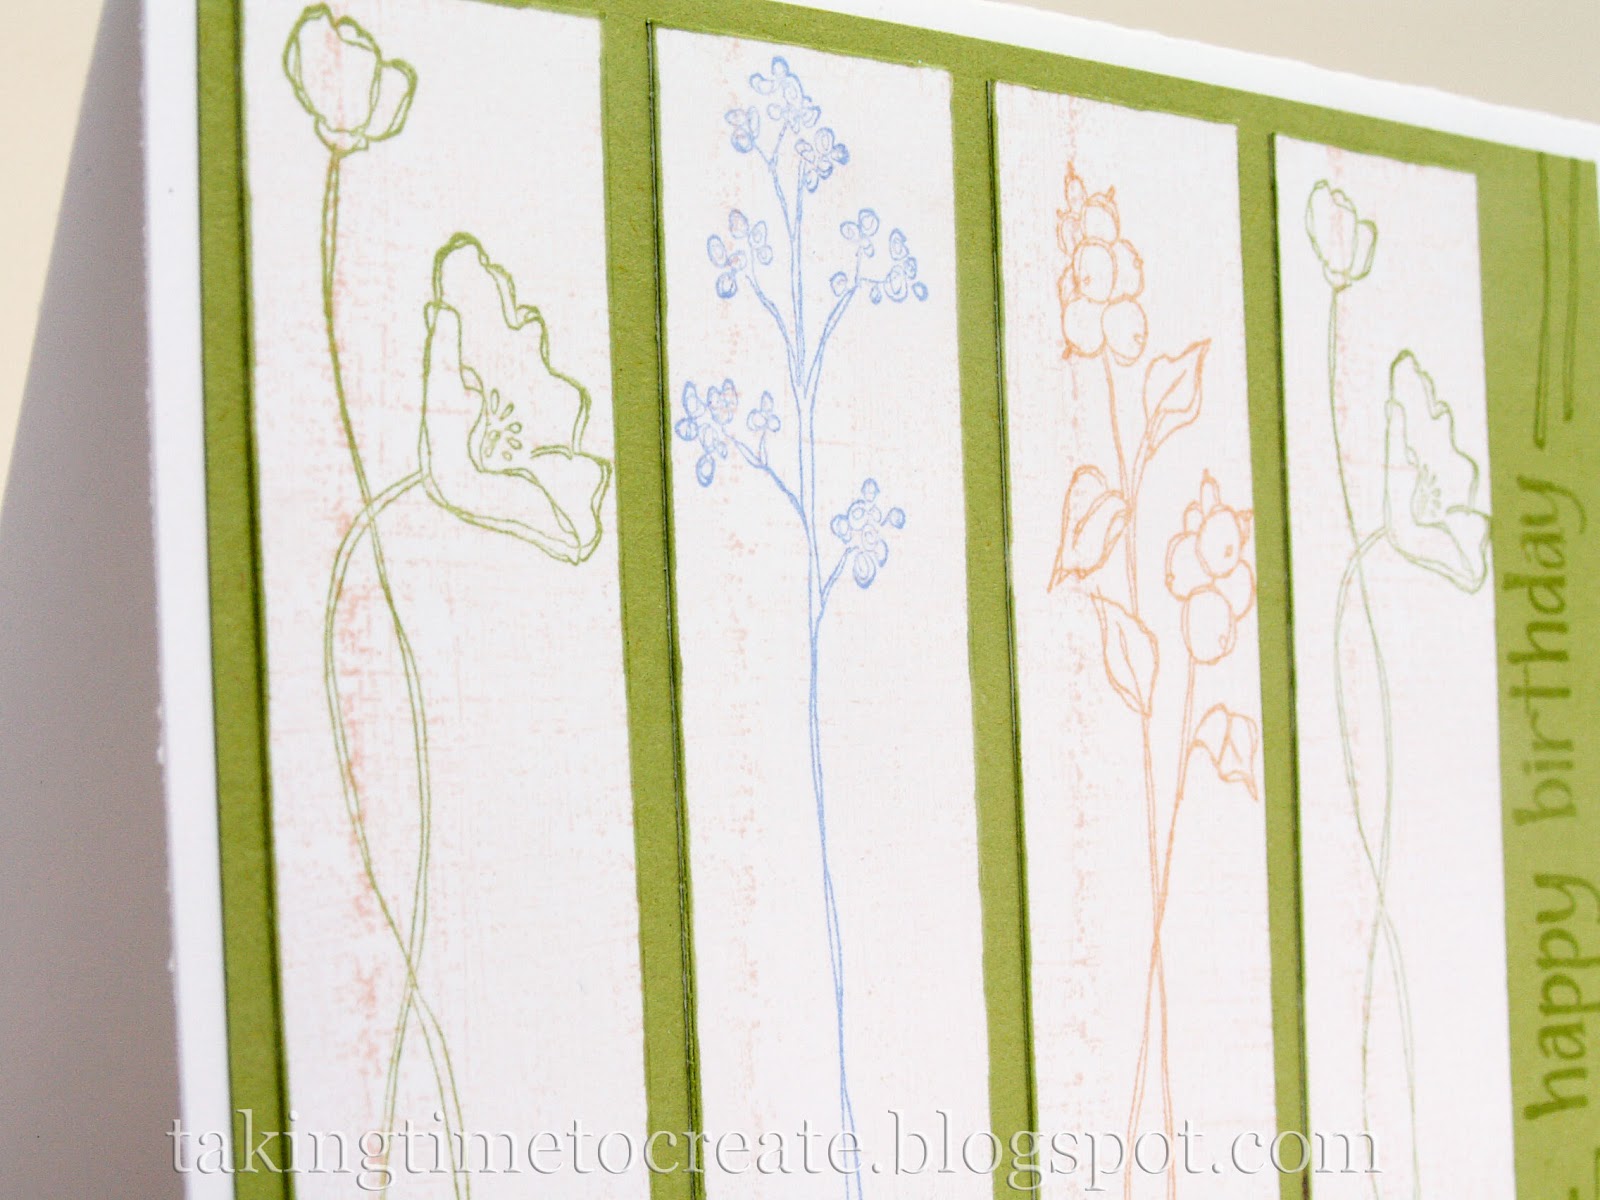
  4. You can barely see it, but I stamped a faint background on each piece of white card stock in a very light pink/peachy color.
  5. Next stamp each piece with a different flower in a different color. I actually only had 3 flowers, so I repeated one color and flower (the flowers on the ends are the same).
  6. Glue your flower pieces onto your green background piece. I started on the left and spaced them so that the space in between each piece was the same as the space above below and to the left side of the first piece. See picture 2 below.
  7. You should have some empty space left after gluing all your pieces. Stamp your sentiment here. If your sentiment doesn't take up the whole space like mine didn't at first you can use the ends of the flower stems to fill up that space. See picture 3 below.
  8. Glue all the pieces together onto the white base.
Picture 2
Close up of flower pieces.

Picture 3
Close up of sentiment.
There you have it. Easy peasy!

Note: I used the "Oh, So Lovely" stamp set from Stampin' Up for the flowers. The sentiment was created using individual words from a clear stamp set (I think I got it at Hobby Lobby)


I'm linking at these great parties:
Mondays: Sweet Sharing Monday * Get Inspired Monday * The Girl Creative * Destination: Cutesy Monday * What's In The Gunny Sack * Etcetorize * Tuesdays: Riverton Housewives Roundup * Ta-Da Tuesday * Tuesdays Cute Crafts & Cute Parties *Happy Family Times * Show Me What You Got * Tuesday Time Out * Tuesday Tidbits * Wednesdays: Super Link Party * Show & Share * {Wow Me} Wednesday * Thursday: Pin'Inspirational Thursday Recipe Roundup *A Crafty Soiriee * Creative Thursday * Fridays: Delicately Constructed Fridays * Flaunt It Friday * Financial Friday Link Up * My Crowded Kitchen * Saturdays: Strut Your Stuff Saturday * Once Upon A Weekend * Sharing Saturday * Dare To Share Saturday * Craft, Create and Inspire * Sundays: Nifty Thrifty Sunday * It's Overflowing Sunday Party 

Tuesday, June 5, 2012

Ladies Birthday Card {Handmade}

 
I really like how this card turned out. It's colorful and girly, but not too young like a child's card might be. Cute, cute!


Here's a little on how to make it:


Cut the standard piece of 5.5x8.5 inch piece of white card stock and fold it in half to create a card 4.25 x 5.5 inches.


Cut a piece of yellow card stock 4x5.25 inches and punch/poke holes all around the edge. I have a guide to help me keep the lines straight and holes evenly spaced and just used a safety pin to poke the holes. Adhere to your white base piece.
Cut a piece of green card stock to fit inside the border you created with the holes. I think my green piece was probably about 3.5x4.75 inches. Adhere to the yellow piece.

Cut a piece of white card stock that is 3.25x4.5 inches. You'll want it to be 1/4 of an inch smaller than the green piece, so if your green piece was a different size than mine, you'll want to adjust the measurement of your white piece.

Stamp flowers in varying sizes and colors.
To add a little detail, I stamped flowers in different colors on a separate sheet of card stock, cut the centers out, and then adhered them to the flowers I stamped on the white piece.
I also stamped one larger flower cut/punched it out and then attached it to the smaller piece with a dimensional adhesive to give the card a little more dimension.
Finally, I stamped "happy birthday" with a small stamp, punched it out with a flower punch, and added some color to the edges of the flower with a marker. I also attached this piece with a dimensional adhesive.
There you have it! 


I'm having a blast at these lovely linking parties.

Tuesday, March 13, 2012

Technique Tuesday-Ladies March Birthday Cards

Every month I make birthday cards for everyone in my family. March had a lot of birthdays (18 or 19 if I remember right)! Making cards is my favorite craft. It's what got me interested in crafting in the first place. My favorite thing about making cards is using different techniques. It's always fun to see how a different technique will turn out. 


I love learning a new technique and thought you might too, so I'm starting a new series: "Technique Tuesday". If you enjoy making cards, I hope these cards will inspire you to make your own. :-)


Pin It
This first card uses a couple techniques. One is dry embossing. I'm not sure if you'd call the other one a technique, but it is kind of fun to make. It's a simple folded paper flower.

Dry embossing creates a raised image on paper. Use a stencil and a dry embossing stylus to make an impression of the stencil. See those little raised dots under the flower? That's where I did the dry embossing.

You can find the tutorial for how to make the flowers here.

The two cards above use a technique that creates different shades of color from the same ink pad. You ink up the stamp, stamp the image, and then stamp the image again (one or more times) without re-inking the stamp.

This last card also uses dry embossing and a variation of the last technique. I layered the images from two stamps, but before I stamped the base of the flower, I stamped on a scrap piece of paper, so the image would be lighter for the actual card.


I'm having a blast at these lovely linking parties.